How to copy a Jira project configuration to existing projects
Jira can create a project from a template, but not make an existing one match it. Copy Space Config links or clones a project's schemes onto many projects.
You have one project that is set up the way you want, and twenty that are not. Jira Cloud lets you create a new project from another project's shared configuration, but it has no button to copy a Jira project configuration onto projects that already exist. The usual answer is to open each project's settings and reassign every scheme by hand: eight scheme types, one project at a time.
Bulker has a tab for exactly this: Copy Space Config. You pick a source project and several target projects, decide per scheme type what should happen, review a preview and apply. (Bulker calls projects "spaces".)
What gets copied
The tab lists every scheme the source project uses: issue type, workflow, issue type screen, field configuration, permission, notification, issue security and priority scheme. For each row you choose one of three things:
| Choice | What happens on each target |
|---|---|
| Skip | Nothing. |
| Link the same scheme | The target uses the source's scheme. One scheme, many projects. |
| Clone, then link | Bulker creates a copy named for the target (for example BETA: Kanban Issue Type Scheme) and links the target to it. |
A clone copies the scheme itself. The workflows, screens, field configurations and issue types behind it stay shared with the source, exactly as when you copy a scheme in Jira's own admin screens. Only company-managed projects can be a source or a target; team-managed projects keep their settings inside the project and are not listed.
Step by step
- Open Settings → Apps → Bulker → Copy Space Config.
- Pick the Source space, then one or more Target spaces. The source cannot be a target.
- In the "What to copy" table choose Skip, Link or Clone per scheme type. A type the source does not set explicitly ("uses the default") cannot be copied.
- Click Preview changes.
- Click Apply N change(s) and confirm.
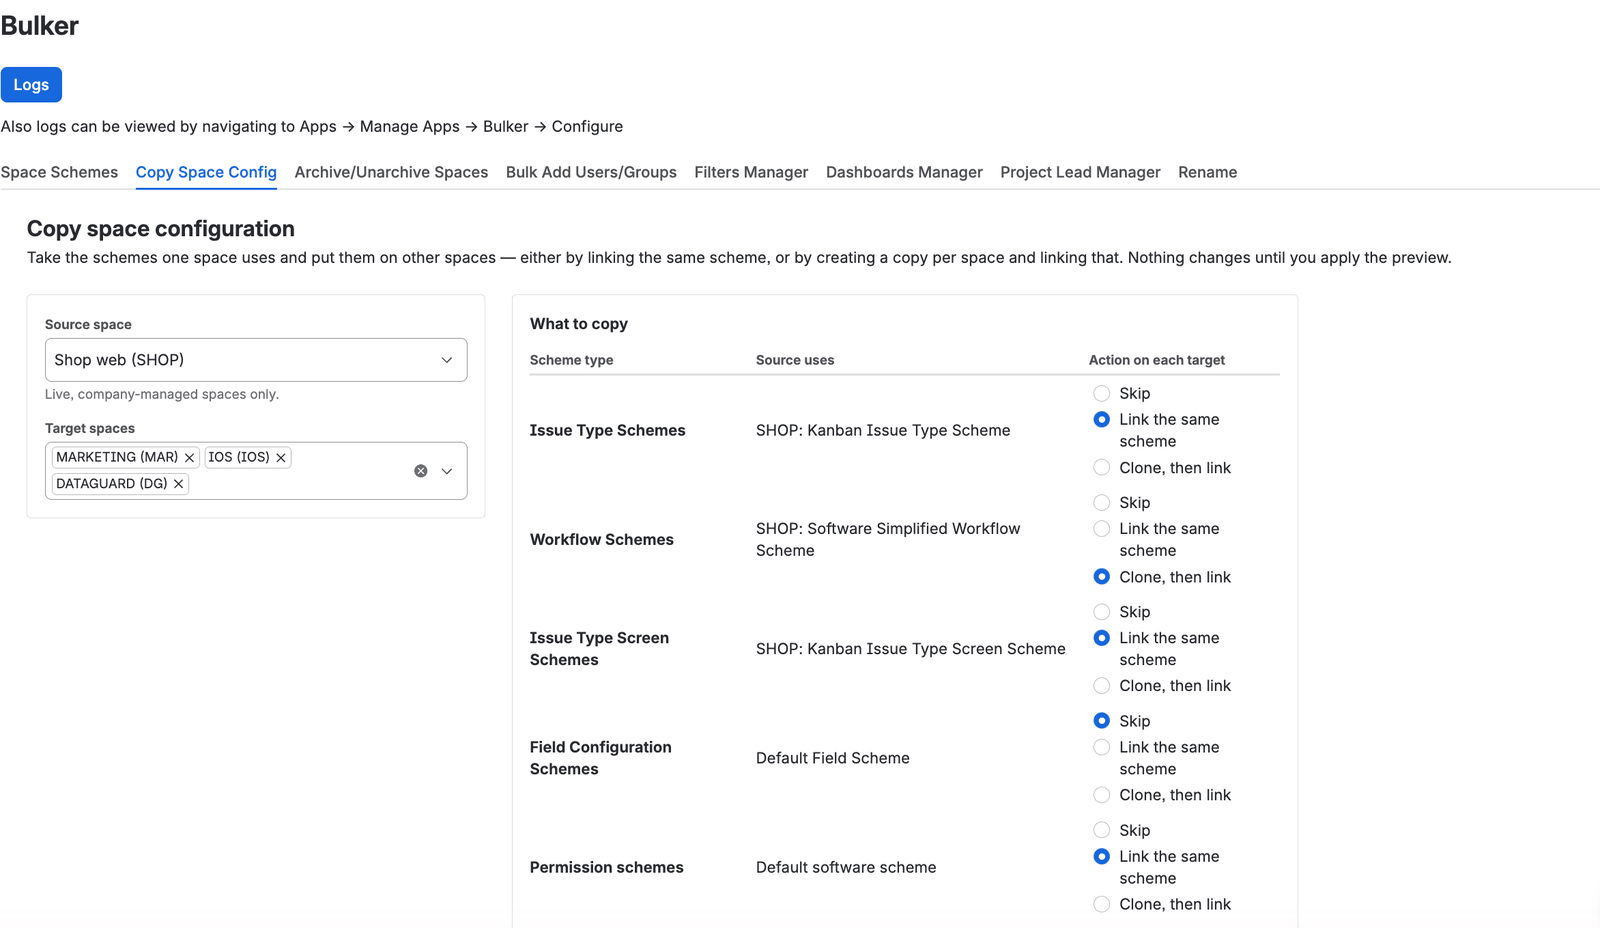
Source, targets, and one decision per scheme type
Read the preview before you apply
Nothing changes until Apply. The preview has one row per target and scheme type: Link, Clone + link (with the exact name of the copy), Already set, or Blocked with the reason. A common block is an issue type scheme whose types are in use on the target; choose Clone instead and the copy is widened with those types without touching any issue.
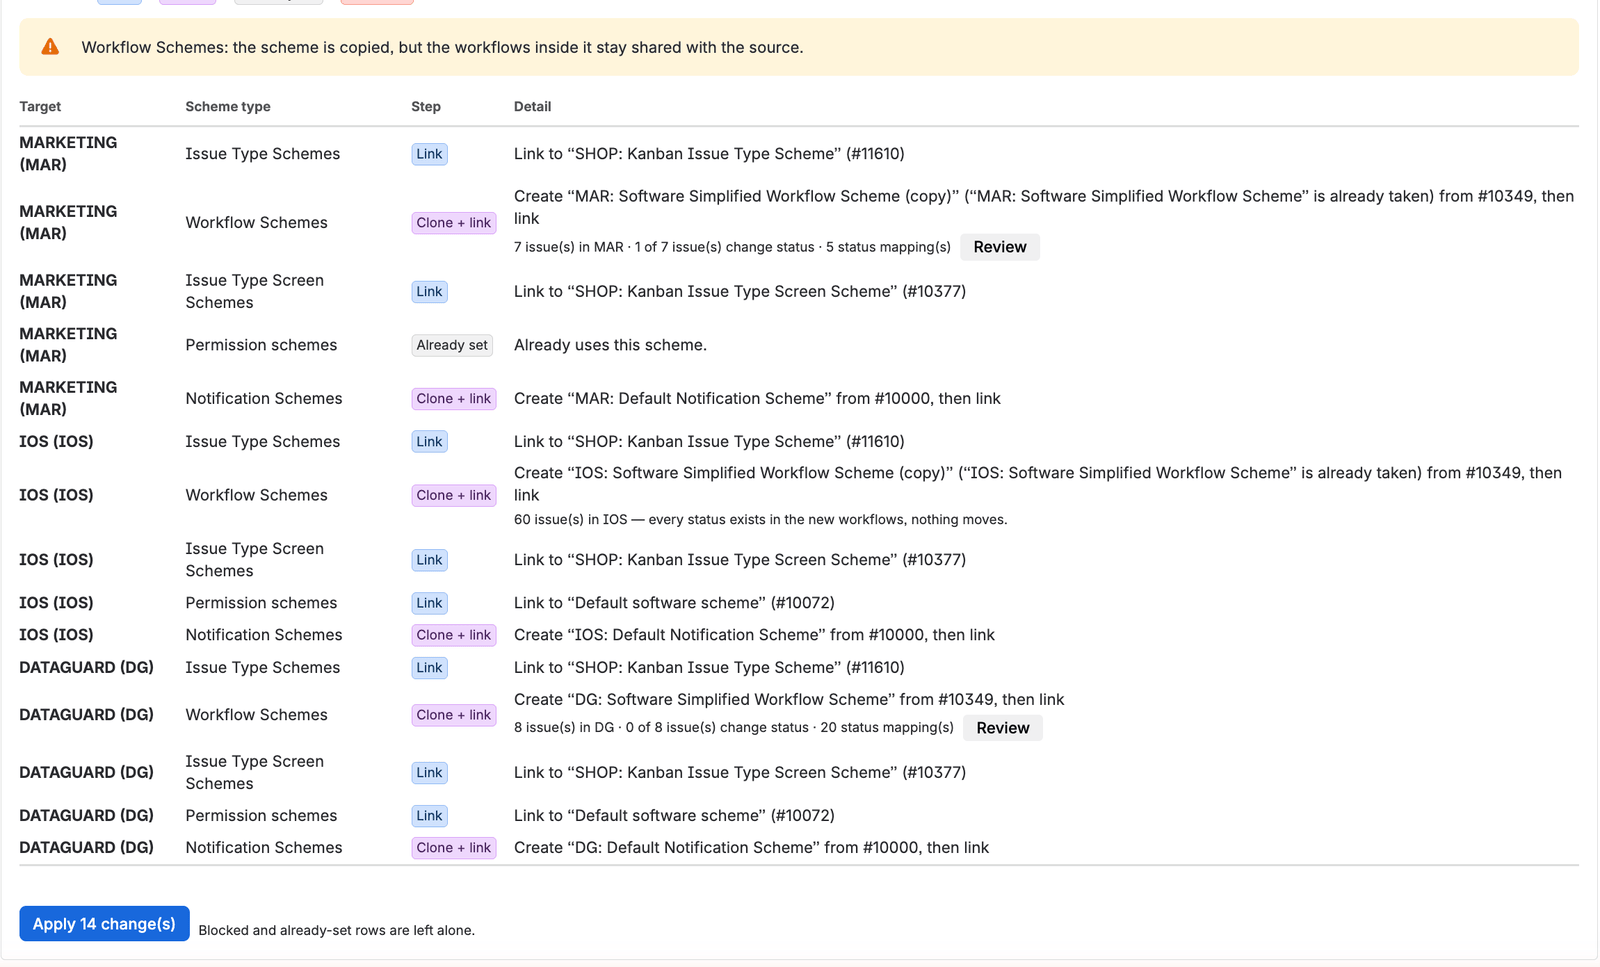
The preview: every change per target, before Apply
If a target has issues and you change its workflow scheme, the preview row offers Review, where you check how statuses are mapped before anything moves.
Link or clone?
Link when the projects should stay identical: change the scheme once and every linked project follows. Clone when a project should start from the same setup and then drift. Bulker names a clone with your Rename naming policy for that scheme type if you have one, otherwise KEY: scheme name; if the name is taken it adds (copy), (copy 2) and so on.
Undo
Every applied copy can be undone; the last five copies are kept. Click Undo… under the results, tick the copies and confirm. Bulker puts the previous schemes back and deletes the clones it created. An undo cannot itself be undone.
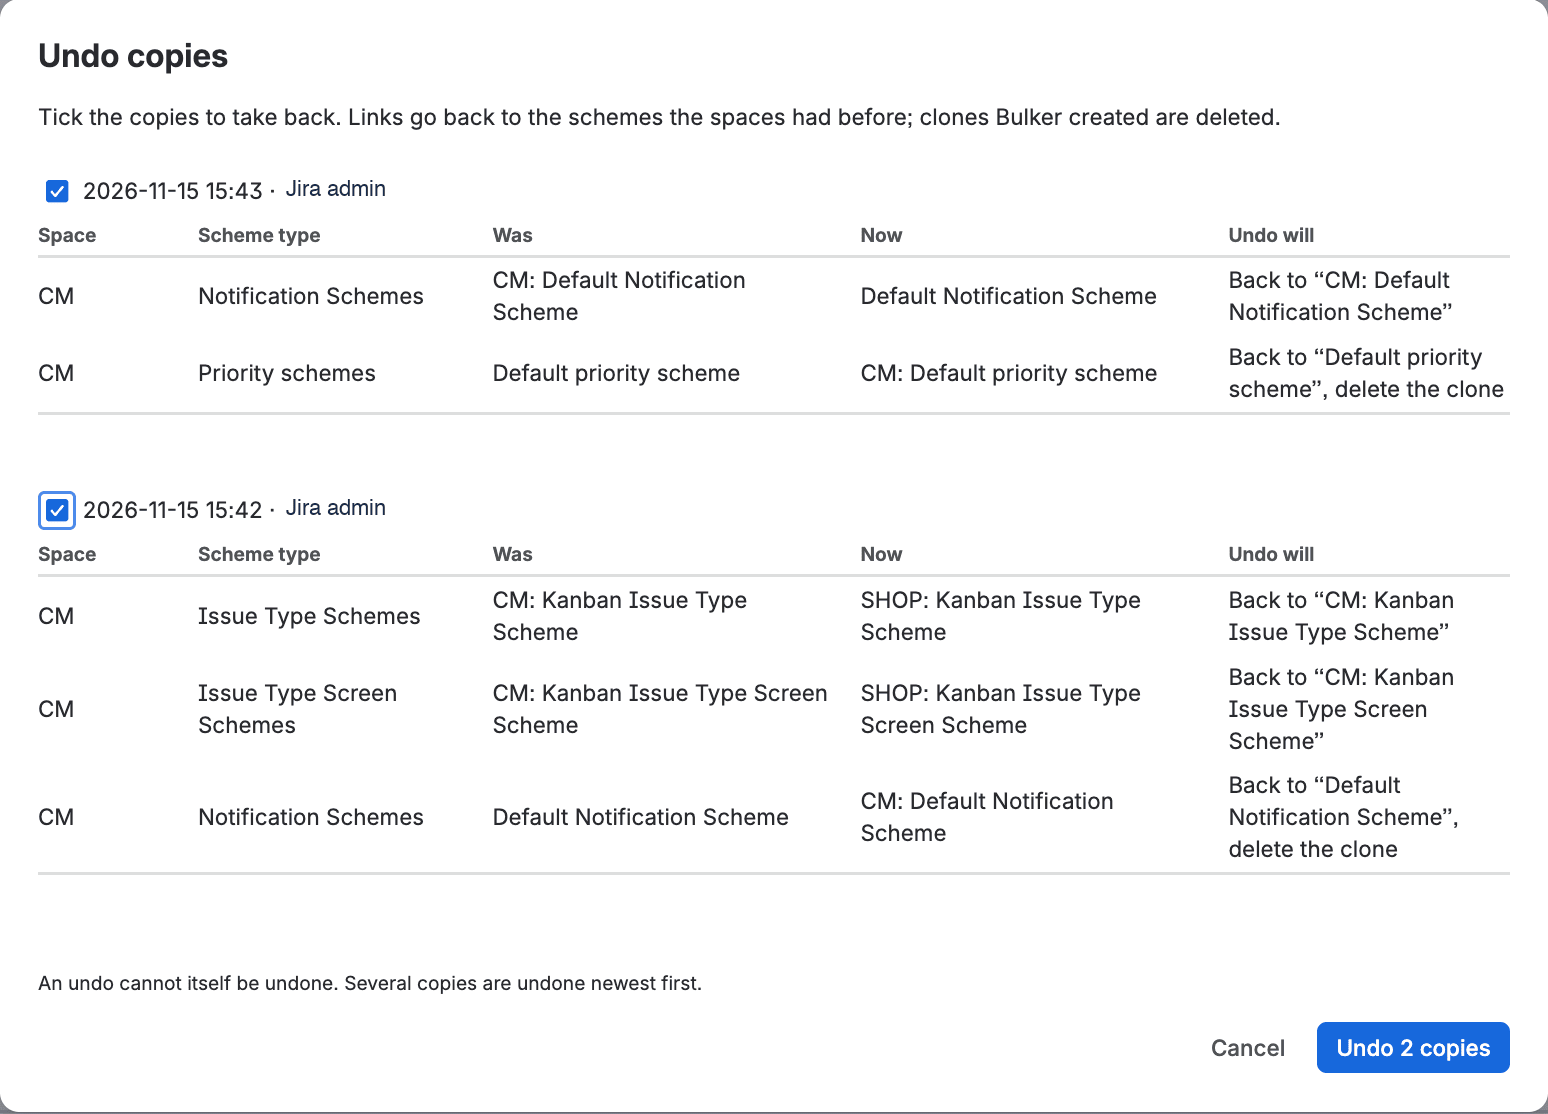
The Undo dialog shows what each copy changed
NOTE: Undo restores schemes. It does not move issues back if a workflow migration changed their status in between, so review the status mapping before you apply.
Good to know
- Notification recipients of the type "email address" are not copied, because Jira no longer allows creating them. The result says how many were dropped.
- Jira may refuse permission scheme changes on a Free plan; the row shows Jira's own message.
- Copying between project types (for example software to service management) gives a caution for the type-bound schemes, not a block. Check the result in the target.
- Every link and clone is written to Bulker's operation log.
FAQ
How do I copy a Jira project configuration to an existing project?
Open Settings → Apps → Bulker → Copy Space Config, choose the source and target projects, set Skip, Link or Clone per scheme type, click Preview changes and then Apply.
Does copying change my issues?
No. Linking and cloning only change which schemes a project uses. Issues are touched only when a workflow scheme changes on a project that has issues; then Jira migrates them to the statuses you reviewed.
Can I copy to team-managed projects?
No. Only company-managed projects are sources or targets, because team-managed projects do not use shared schemes.
Can I undo a copy?
Yes. The last five copies stay undoable from the Undo… button. Links go back and clones are deleted.
Does Copy Space Config copy workflows, screens or fields themselves?
No. It copies the scheme. What the scheme refers to stays shared with the source project.
Make one project the template for the rest
Install Bulker from the Atlassian Marketplace, pick the project you are proud of and copy its configuration to the ones you are not.
More guides in this series: