How to bulk archive Jira projects (and unarchive them)
Bulk archive Jira projects in one go with Bulker's Archive/Unarchive Spaces tab, restore them later, or run both as Jira Automation actions.
Every Jira site accumulates projects nobody works in any more: the pilot from two years ago, the vendor project after the contract ended, twenty sprint sandboxes. Jira can archive them, but only from each project's own settings, one project at a time. If you need to bulk archive Jira projects — ten, fifty, a whole department — that is an afternoon of clicking.
Bulker adds an Archive/Unarchive Spaces tab to Jira administration that archives any number of projects in one submission, restores them the same way, and exposes both as Jira Automation actions so archiving can happen on a schedule or when a request ticket is closed. This guide walks through all three, and says plainly what Bulker does not do.
NOTE: Bulker calls Jira projects spaces throughout its interface. Wherever you read "space" below, it means a Jira project.
What archiving does in Jira
Archiving a project in Jira Cloud takes it out of daily use without deleting anything: the project and its issues become read-only, disappear from the project list and from searches, and stay recoverable until a Jira admin restores them. Nothing in the project is changed — Bulker only calls Jira's own archive and restore operations for each project you pick, so the result is exactly what you would get from the project settings page.
NOTE: Project archiving is a feature of Jira Cloud's Premium and Enterprise plans. On a plan without it, Jira refuses the request and Bulker shows Jira's answer next to the project name instead of pretending it worked.
What the Archive/Unarchive Spaces tab does
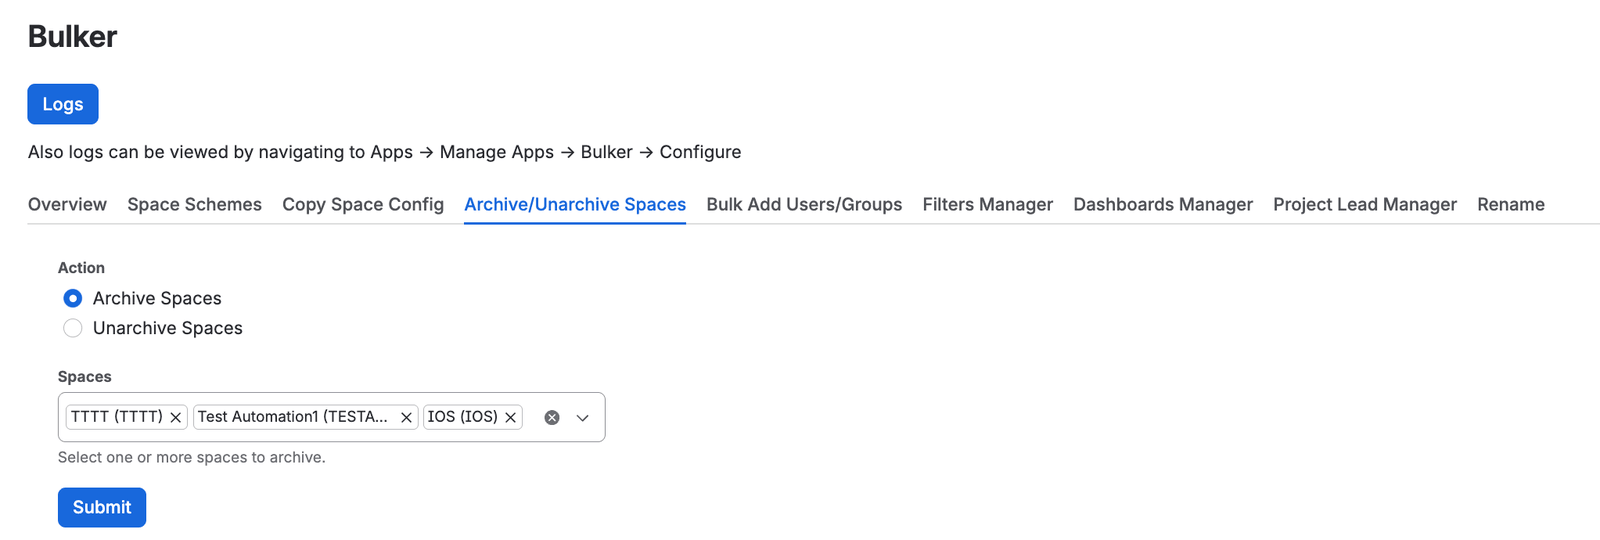
Pick the projects, press Submit, done
The tab has one radio group, one picker and one button. Action switches between Archive Spaces and Unarchive Spaces. The Spaces picker lists exactly the projects the chosen action applies to: live projects when you archive, archived projects when you unarchive. Each entry reads Project name (KEY) and the list is searchable.
Only company-managed projects are offered. Team-managed projects do not appear in the picker, so you cannot archive one by accident from here.
After Submit, Bulker processes the selected projects one after another and prints a line per project. A failure on one project does not stop the others — Bulker keeps the results it already has and carries on.
How to bulk archive Jira projects, step by step
Step 1 — Open the tab
Go to Settings → Apps → Bulker and open Archive/Unarchive Spaces. Leave Action on Archive Spaces. Bulker loads the live company-managed projects; while it does, the picker shows a spinner.
Step 2 — Pick the projects
Type in the Spaces picker to find projects by name or key and tick as many as you need. The helper line under the picker reads "Select one or more spaces to archive." If the site has no live company-managed projects left, the picker says "No active spaces found."
Step 3 — Submit
Press Submit. The button reads Processing... while Bulker works, and the result appears under Status: as one line per project:
Successfully archived space 'Vendor Onboarding'.Error archiving space 'Sandbox 12': <Jira's answer>— in red, with the status Jira returned.
When the run is finished the picker reloads, so the projects that were just archived are no longer on the list and you can go straight to the next batch.
How to unarchive Jira projects in bulk
Switch Action to Unarchive Spaces. The picker now lists the archived company-managed projects; if there are none, it says "No archived spaces found." Tick the projects to restore and press Submit. The status lines read Successfully unarchived space '…'. or Error unarchiving space '…': …, and the restored projects leave the list the same way.
Restoring is the same Jira operation an admin would run from the project settings — the project comes back with its issues, boards and configuration as they were when it was archived.
Archive and unarchive Jira projects automatically with Jira Automation
The same two operations exist as actions in Jira Automation, so a project can be archived without anyone opening Bulker. In the rule editor, under Add component → Action, you will find Archive Space ("Archive one or more Jira spaces") and Unarchive Space ("Unarchive one or more Jira spaces").
Both actions have a single field, Spaces. It takes comma-separated project keys — or project IDs — and smart values that Jira resolves when the rule runs, for example {{issue.project.key}} or {{project.key}}. The field is required; the rule won't save without it.
NOTE: The automation actions are part of Bulker's Advanced edition. On a Standard licence the action does not run and the rule's audit log shows Bulker's message: "Automation features are available only in the Advanced edition. Please upgrade to Advanced edition to use automation actions." An evaluation licence without a chosen edition is treated as Advanced, so you can test the actions during a trial.
Example rule: archive a project when its offboarding ticket is closed
Say your admins track project retirement in a request project where every ticket has a short-text field Project key.
- Trigger: Issue transitioned — to status Done, scoped to the request project.
- Condition: Issue fields condition — Project key is not empty.
- Action: Archive Space, with Spaces set to
{{issue.Project key}}.
Close the ticket, and the project named in it is archived. A mirror rule with a Manual trigger and the Unarchive Space action gives the same team a one-click restore. For a periodic clean-up, a Scheduled trigger with a fixed list of keys in Spaces — OLD1, OLD2, OLD3 — works just as well.
Two things to know about how the actions run:
- They run as the rule actor, not as the app. The actor needs the right to archive the project, otherwise Jira refuses and the audit log says so.
- Each key is handled on its own. If one project cannot be archived, the audit log lists it as
Failed to archive project 'KEY (Name)': <reason>and the others still go through. When everything succeeds the log readsSuccessfully archived project KEYorSuccessfully archived 3 project(s).
What the Logs page shows
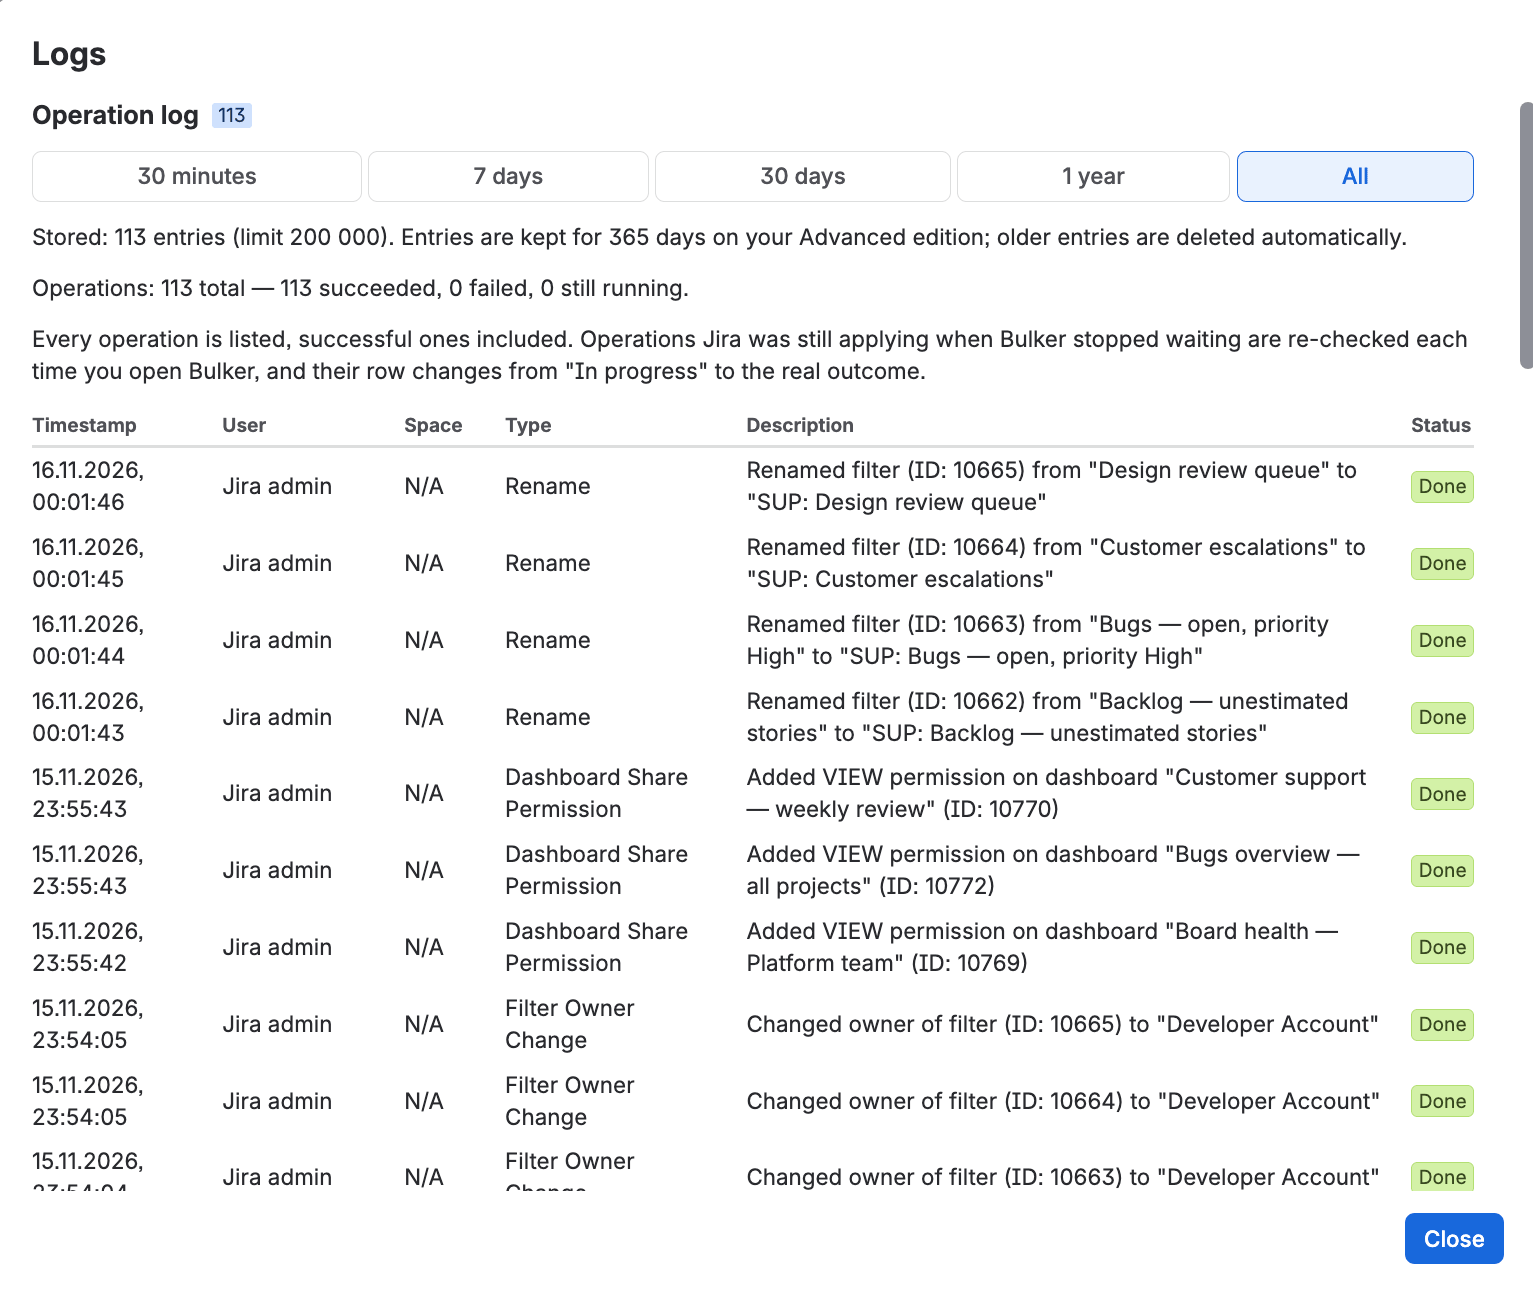
Every run, successful ones included, with Jira's answer
Every run from the tab is recorded on Bulker's Logs page (the Logs button at the top of Bulker, or Apps → Manage apps → Bulker → Configure). For archiving, each project gets one row with the columns Timestamp, User, Space (Project name (KEY)), Type — always Project Archival — and Description, which reads Archived for an archive run and Restored for an unarchive run. Status is a lozenge: Done or Failed.
Above the table, a summary line counts the operations stored: "Operations: N total — succeeded, failed, still running."
NOTE: Runs started from Jira Automation are written to the Logs page too, with a Type that starts with "Automation:" and the rule actor as the user.
Limits and trial
A paid Bulker licence has no limit on the number of projects per run. During the evaluation period the tab enforces a few caps, and tells you before anything runs:
- 3 spaces per operation for archiving and 3 for unarchiving. Selecting more shows: "Trial limitation: You can only process 3 spaces per operation. Please reduce your selection or purchase a license for unlimited access."
- 20 operations per day and 100 operations in total across all of Bulker's tabs.
- 5 automation action runs per day; beyond that the audit log shows "Automation action limit reached (5 runs per day). Please purchase a license for unlimited access."
- Log entries are kept for 7 days on a trial.
FAQ
Can I archive multiple projects in Jira Cloud at once?
Not with Jira alone — archiving lives in each project's settings. With Bulker, open Archive/Unarchive Spaces, tick any number of company-managed projects in the Spaces picker and press Submit. Each project gets its own result line.
How do I unarchive several Jira projects at once?
In the same tab set Action to Unarchive Spaces. The picker then lists only archived projects; tick the ones to restore and press Submit. Bulker calls Jira's restore operation for each and reports Successfully unarchived space '…'. per project.
How do I archive a Jira project automatically with Jira Automation?
Add the Archive Space action to a rule and put the project key, an ID or a smart value such as {{issue.project.key}} in its Spaces field. The action needs Bulker's Advanced edition and runs as the rule actor, who must be allowed to archive the project.
Why doesn't my project appear in the Spaces picker?
The picker only lists company-managed projects, and only those the chosen action applies to: live projects for Archive Spaces, archived projects for Unarchive Spaces. Team-managed projects are not offered.
Does archiving with Bulker change anything inside the project?
No. Bulker sends Jira's own archive request for each project you pick — the same operation as in the project settings. Issues, boards and configuration stay as they are; the project becomes read-only until it is restored.
Where do I see what was archived and by whom?
On Bulker's Logs page. Each run from the tab adds a row with Timestamp, User, Space, Type Project Archival, Description Archived or Restored, and a Done or Failed status. Runs from Jira Automation are recorded in the rule's audit log instead.
Try Bulker
Bulker takes the one-at-a-time out of Jira administration — archiving and restoring projects, assigning schemes, managing roles and leads, renaming configuration objects. Archiving is one tab among several; for a look at the others, see the Bulker release notes — July 2026 and the Bulker release notes — September 2026. For the wider picture, see Bulk Jira admin: how to save 3 hours a week.
More guides in this series: